Now Reading: Unraveling the Fun: Your Ultimate Guide to Scoubidous
-
01
Unraveling the Fun: Your Ultimate Guide to Scoubidous
Do you remember those colorful plastic strings from your childhood? The ones you’d weave and knot for hours to create keychains, bracelets, and little animal figures? Those amazing crafts are made with scoubidous, and they’re making a huge comeback. Whether you’re a nostalgic adult looking to relive a favorite pastime or a new crafter searching for a fun, screen-free activity, you’ve come to the right place. This guide will unravel everything you need to know about the vibrant world of scoubidous.
This craft is more than just plastic lacing; it’s an art form that has captivated generations. It’s a simple, affordable, and incredibly creative hobby that anyone can learn. We’ll explore its history, the essential materials you’ll need, basic and advanced knotting techniques, and some exciting project ideas to get you started. Get ready to twist, loop, and tie your way to amazing creations.
Key Takeaways
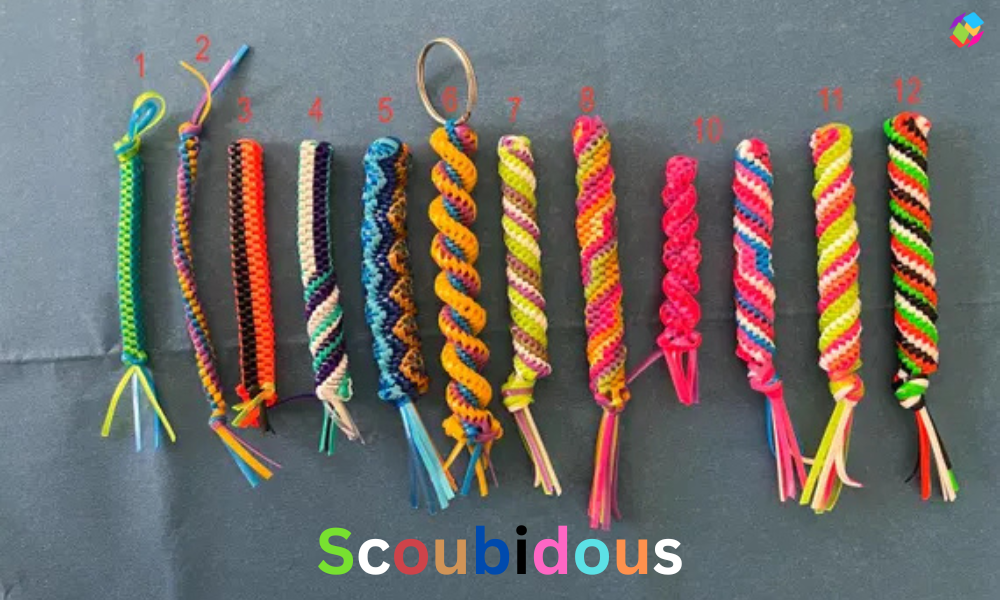
- Scoubidous Defined: Scoubidous are hollow, plastic PVC tubes used for knotting and braiding into various shapes and items.
- Simple to Start: Getting started is easy and inexpensive, requiring only the plastic strings and your hands.
- Core Techniques: The square stitch (or box stitch) and the spiral stitch are the foundational knots for most projects.
- Endless Creativity: From simple keychains to complex animal figures, the creative possibilities are virtually limitless.
- Benefits for All Ages: This craft helps improve fine motor skills, concentration, and offers a relaxing, mindful activity.
What Exactly Are Scoubidous?
At its core, scoubidous refers to both the craft and the material used to do it. The material itself is a type of plastic lacing, often called gimp, boondoggle, or lanyard string in the United States. It consists of thin, hollow tubes made from PVC plastic, which makes them flexible, durable, and perfect for knotting. These strings come in a dazzling array of colors, from bright neons and pastels to glittery and glow-in-the-dark varieties.
The term scoubidous originated in France and became a massive craze in the late 1950s. The name was popularized by a French singer named Sacha Distel, whose hit song “Scoubidou” featured a character who played with a similar-looking object. The trend exploded, and soon, children all over Europe were busy knotting these colorful strands. While its popularity has waxed and waned over the decades, the simple joy of creating something with your own hands has ensured that scoubidous never truly disappears.
The History Behind the Knotting Craze
The story of scoubidous is a fascinating piece of pop culture history. The craft’s origins can be traced back to the post-war era, but it truly hit its stride in the late 1950s. After Sacha Distel’s song became a hit in France in 1958, the craft became a national phenomenon. Kids were seen everywhere—in schoolyards, parks, and homes—with bundles of colorful plastic strings, trading tips and showing off their latest creations.
This initial boom lasted for several years before fading into the background. However, like many beloved trends, scoubidous experienced a major revival in the early 2000s. A new generation discovered the fun of knotting these plastic laces, and the craft became popular all over again, spreading across Europe and other parts of the world. This resurgence was helped by the availability of new colors, finishes, and project books, breathing new life into a classic hobby. Today, it remains a cherished activity for those seeking a hands-on, creative outlet.
Getting Started: The Essential Tools and Materials
One of the best things about scoubidous is how little you need to get started. It’s an accessible hobby that doesn’t require a hefty investment in tools or supplies. Here’s a simple breakdown of what you’ll need.
The Strings Themselves
The most important item is, of course, the scoubidous lacing. When you’re buying it, you’ll notice it comes in various types:
- Standard: The classic round, hollow plastic string. Perfect for beginners.
- Glitter: Infused with glitter for a sparkly, eye-catching effect.
- Glow-in-the-Dark: These strings absorb light and glow in the dark, making for fun zipper pulls and decorations.
- Translucent: See-through strings that add a unique, jewel-like quality to your projects.
A multi-color pack is a great way to start, as it gives you plenty of options for experimenting with different color combinations.
Basic Tools
While you can do most things with just your hands, a few simple tools can make the process easier, especially for finishing your projects.
- Scissors: A good pair of scissors is essential for cutting the strings to your desired length and for trimming the ends neatly.
- Lighter or Thread Zap: For a professional finish, adults can use a lighter to carefully melt the plastic ends. This prevents them from fraying and secures the final knot. This step should always be done by an adult or with strict adult supervision. A thread zap tool is a safer, heat-free alternative for sealing ends.
- Key Rings and Clips: If you plan on making keychains or zipper pulls, you’ll need metal key rings or plastic lanyard clips to attach your creations.
The Foundational Knots: Your First Steps in Scoubidous
Mastering a few basic knots is the key to unlocking a world of scoubidous projects. The two most fundamental stitches are the square stitch and the spiral stitch. Once you get the hang of these, you’ll be able to create a huge variety of designs.
H3: The Square Stitch (Box Stitch)
The square stitch is the cornerstone of scoubidous. It creates a sturdy, four-sided braid that is perfect for keychains, bracelets, and the bodies of figures.
How to Do the Square Stitch:
- Start: Take two strands of scoubidous string. Fold one strand in half to find its center. Place the center of the second strand over the center of the first, forming a “+” shape.
- The First Loop: Take one end of the bottom string and loop it over the top string next to it.
- The Second Loop: Take the other end of the bottom string and loop it over the top string on its side. You should now have two loops.
- Weave: Now, take one end of the top string. Weave it over the first loop you made and under the second loop.
- Weave Again: Take the remaining end of the top string. Weave it over the loop on its side and under the other.
- Tighten: Carefully pull all four strands outwards. You’ll see a small, square knot form in the center. This is your first stitch!
- Repeat: Continue this process, always looping and weaving in the same pattern, to grow your square braid.
It might feel a bit clumsy at first, but after a few tries, you’ll develop a rhythm. Keeping your tension even is the key to a neat and uniform stitch.
H3: The Spiral Stitch (Circle Stitch)
The spiral stitch, also known as the circle or barrel stitch, creates a beautiful twisted design. It’s made almost exactly like the square stitch, but with one tiny change.
How to Do the Spiral Stitch:
- Start: Begin just like you would for a square stitch, creating a “+” shape with two strings.
- Loop: Make your first two loops with the bottom string, just as before.
- The Twist: Here’s the difference. When you weave the top strands, instead of going over-and-under, you will weave them both diagonally under the loops. Take the right-hand strand and weave it under the left-hand loop. Then, take the left-hand strand and weave it under the right-hand loop.
- Tighten: Pull all four strands tight. You will see the knot start to twist.
- Repeat: Continue this pattern, and your scoubidous will form a beautiful, rounded spiral.
The spiral stitch is great for creating more decorative keychains, friendship bracelets, or even the legs and arms of your scoubidous animals.
Basic Scoubidous Project Ideas for Beginners
Once you’ve practiced the basic stitches, you’re ready to tackle some simple but rewarding projects. These are perfect for building your confidence and getting a feel for how the strings work.
The Classic Keychain
A keychain is the quintessential first scoubidous project. It’s a great way to practice the square or spiral stitch.
- Cut Your Strings: Cut two strings, each about 3 feet long.
- Attach to Ring: Fold one string in half and loop it through your key ring, then pull the ends through the loop to secure it (this is called a lark’s head knot). Lay the second string behind the knot.
- Start Stitching: Begin your chosen stitch—square for a classic look, or spiral for a twist.
- Continue: Keep stitching until your keychain reaches the desired length. A length of 3-4 inches is usually good.
- Finish: To finish, simply tie all four strands together in a tight knot. Trim the excess string, and if an adult is helping, melt the ends to secure them.
Friendship Bracelets
Creating bracelets is another fantastic beginner project. You can use bright color combinations to make personalized gifts for your friends. For a bracelet, it’s best to use a slightly shorter starting length, perhaps 2 feet per string, depending on wrist size. You can finish it with a simple knot or get creative by incorporating a clasp. The flexibility of scoubidous makes it comfortable to wear.
Zipper Pulls
A mini-keychain makes a perfect zipper pull for a backpack, jacket, or pencil case. Use a shorter length of string and attach it to a lanyard clip instead of a key ring. These are quick to make and can be a fun way to customize your belongings. Glow-in-the-dark scoubidous is an especially popular choice for zipper pulls.
Advancing Your Skills: Intermediate Techniques
Ready to move beyond the basics? There are many ways to add complexity and flair to your scoubidous creations. Trying new techniques will open up a whole new level of design possibilities.
H3: Adding More Strands
Why stick to just four strands? You can create thicker, more intricate braids by incorporating more strings.
- Six-Strand Braid: Start with three strings instead of two. This will allow you to make a hexagonal braid, which is a bit more complex but creates a beautiful, substantial pattern. The principle is the same: loop and weave, but with more strands to manage.
- Eight-Strand Braid: For a really chunky, impressive look, use four strings to create an octagonal braid. This requires more concentration to keep track of all the strands, but the result is well worth the effort.
H3: Creating Shapes and Bends
Making your scoubidous bend and form shapes is essential for creating figures like animals or letters. The main technique for this is called the “wall stitch” or “super stitch.” This involves looping one strand around an existing stitch to change direction or build a new section outwards from your main braid. For example, to make a leg for an animal, you would use a wall stitch to start a new, smaller braid branching off from the body. Exploring different projects online, like those found on craft sites or even educational platforms like Forbes Planet, can provide great visual tutorials for these more advanced methods.
H3: The Brick Stitch
The brick stitch (or flat stitch) is another popular technique that creates a flat, wide weave, similar to a woven potholder. It’s perfect for making coasters, wide bracelets, or even small mats. This stitch involves weaving the strands back and forth in a pattern that lays them flat instead of creating a square column. It can be tricky to start, but once you establish the pattern, it’s quite repetitive and relaxing to do.
Comparing Popular Scoubidous Stitches
|
Stitch Name |
Appearance |
Common Uses |
Difficulty |
|---|---|---|---|
|
Square Stitch |
Four-sided, square column |
Keychains, bracelets, bodies of figures |
|
|
Spiral Stitch |
Rounded, twisted column |
Decorative keychains, bracelets, accents |
Beginner |
|
Brick Stitch |
Flat and wide, like a mat |
Coasters, wide bracelets, bookmarks |
Intermediate |
|
Six-Strand Braid |
Six-sided, hexagonal column |
Thicker keychains, decorative items |
Intermediate |
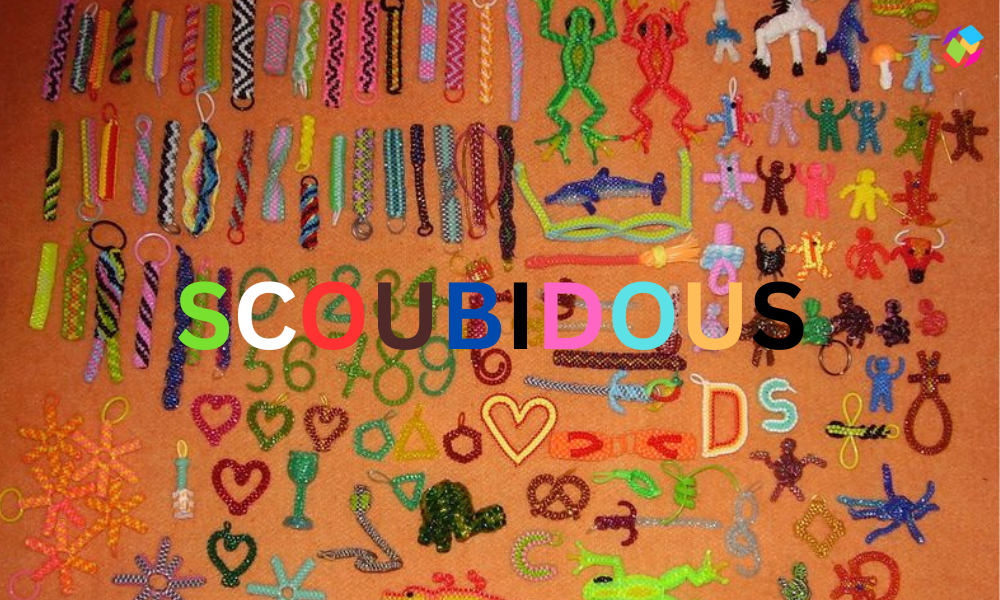
Creative Scoubidous Projects to Inspire You
The real magic of scoubidous lies in its creative potential. Once you are comfortable with the basic and intermediate stitches, you can try making more elaborate designs.
Little Critters and Animals
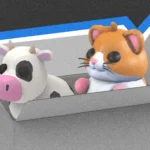
Creating small animals is a classic advanced scoubidous project. Popular choices include:
- Lizards and Geckos: These are a great next step, as they involve making a body, four legs, and a tail. This project teaches you how to start new braids off a central one.
- Dragonflies: By making a body and then adding two sets of wings using a flat stitch, you can create beautiful dragonflies.
- Turtles: This involves making a flat, round shell using a circular weaving technique and then attaching a head and legs.
Letters and Names
Personalize your creations by spelling out names or initials. This requires careful planning and the ability to create sharp bends and straight lines. You can make individual letters to hang as decorations or string them together to spell a word on a banner.
Functional and Decorative Items
Don’t limit yourself to just keychains! Think about other ways you can use your scoubidous skills:
- Pen Toppers: Create a small design to sit on top of your pen or pencil.
- Coasters: Use the brick stitch to make a colorful set of coasters for your desk.
- Plant Hangers: By using longer and more numerous strands, you can construct a small, decorative hanger for a tiny air plant.
The Benefits of Crafting with Scoubidous
This simple craft offers a surprising number of benefits for both kids and adults. It’s more than just a way to pass the time; it’s a productive and healthy activity.
For children, working with scoubidous is excellent for developing fine motor skills. The process of looping, weaving, and pulling the strands tight strengthens finger dexterity and hand-eye coordination. It also teaches patience and concentration, as they must focus to follow the patterns correctly. Completing a project gives them a wonderful sense of accomplishment and a boost in confidence.
For adults, scoubidous can be a form of mindfulness. The repetitive motions of knotting can be very meditative, helping to reduce stress and anxiety. It provides a welcome break from screens and the constant buzz of digital life. Focusing on the colors and patterns allows your mind to relax and enter a state of creative flow. It’s a nostalgic and simple way to reconnect with a more hands-on, tactile form of entertainment.
Conclusion
From a simple playground fad to a timeless craft, scoubidous has proven its staying power. Its appeal lies in its simplicity, affordability, and the endless room it provides for creativity. With just a few colorful plastic strings, you can unlock a world of knotting fun, creating everything from simple keychains to intricate works of art. It’s a hobby that bridges generations, offering developmental benefits for kids and a relaxing escape for adults.
So why not pick up some strings and give it a try? Start with a simple square stitch, master the spiral, and see where your imagination takes you. Whether you’re making a gift for a friend, personalizing your gear, or just enjoying a quiet moment of creative focus, the vibrant and versatile world of scoubidous is waiting for you to explore.
Frequently Asked Questions (FAQ)
Q1: What is the best type of scoubidous string for beginners?
For beginners, the classic round, hollow plastic lacing is the best choice. It’s easy to handle, holds its shape well, and is the most common type used in tutorials. Starting with a multi-color pack will give you plenty of options for your first projects.
Q2: How do I finish a scoubidous project securely?
The most common way to finish a project is to tie all the loose ends into a tight overhand knot. For extra security, trim the ends to about a quarter-inch and have an adult carefully melt them with a lighter. The melted plastic will fuse together, preventing the knot from ever coming undone.
Q3: My square stitch looks twisted. What am I doing wrong?
If your square stitch is starting to twist, it’s likely you’ve accidentally switched to a spiral stitch pattern. This happens when you weave the strands diagonally instead of straight across. Go back a few stitches and make sure you are weaving each strand over the adjacent loop and under the opposite one. Consistent tension also helps maintain a square shape.
Q4: How long should my scoubidous strings be?
A good rule of thumb is that your finished braid will be about one-fourth the length of your starting strands. For a standard 4-inch keychain made with two folded strings, starting with two 3-foot strands is a safe bet. It’s always better to start with strings that are a little too long than too short.
Q5: Where can I find more advanced scoubidous patterns?
The internet is a treasure trove of patterns and video tutorials. Websites like YouTube, Pinterest, and dedicated crafting blogs have thousands of ideas, from simple animals to complex geometric designs. Searching for “boondoggle patterns” or “scoubidou tutorials” will yield many great results.
Stay Informed With the Latest & Most Important News
Previous Post
Next Post


Advertisement